
noobot
Cheap Money-Saving Self-hosted AI agent workspace with tool calling, MCP, multi-model routing, sandboxed execution, multi-agent workflows, and LLM-authored 3D character animation rendered with Three.js.
Automatically checked · GitHub checked 2026-11-12
Overview
Noobot
Say goodbye to the 1-dollar hello-world era.
Cheap Money-Saving Self-hosted AI agent workspace for tool calling, multi-model routing, MCP, and multi-agent workflows.
中文 | English



Windows installer (choose Noobot.Setup.<version>.exe) · macOS package (choose Noobot-<version>-mac.zip) · Configuration · Discussions
Noobot is an open-source Web and desktop AI agent application built with Node.js, Vue 3, and Electron. It provides isolated user workspaces, durable sessions, extensible tools, semantic workflows, and model-family routing across OpenAI-compatible providers from one self-hosted deployment.
Co-creators: Hyler · Epicur · gonglei · Z · Y · C
See Noobot in Action
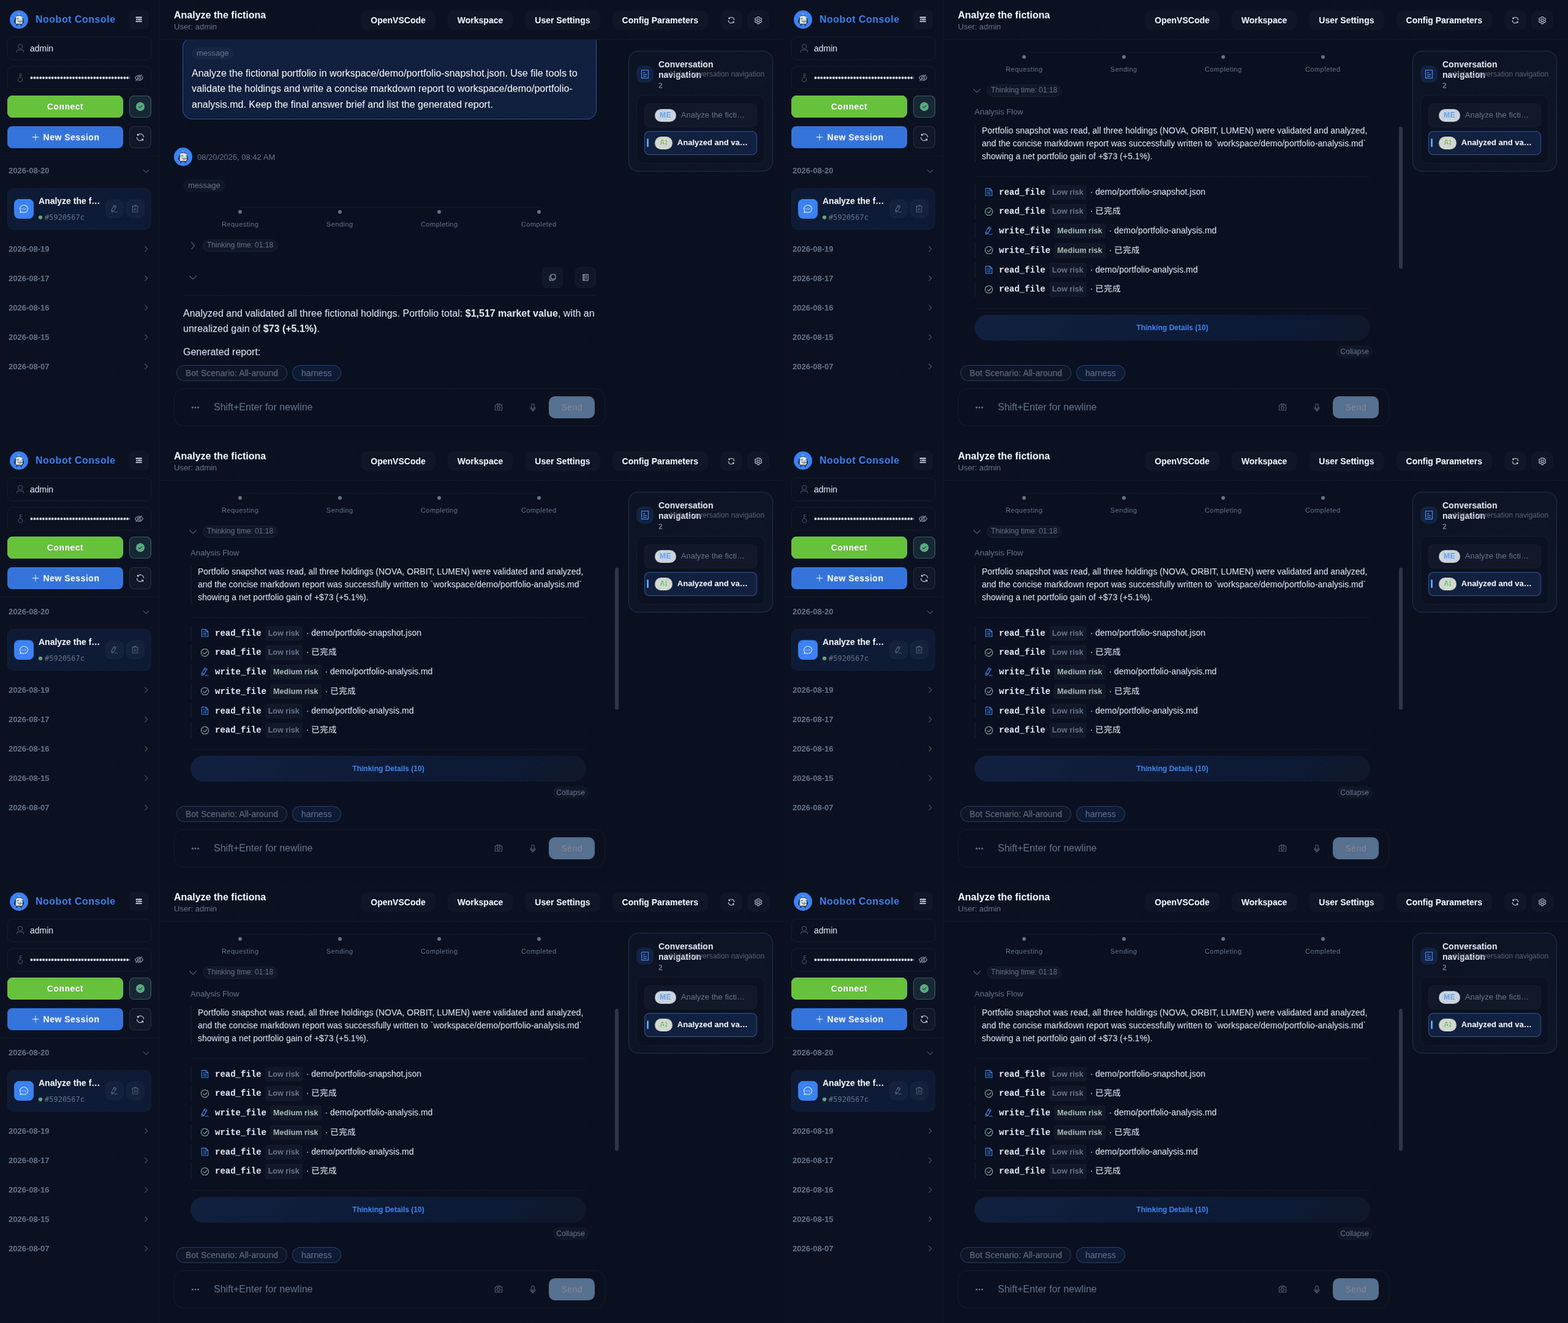
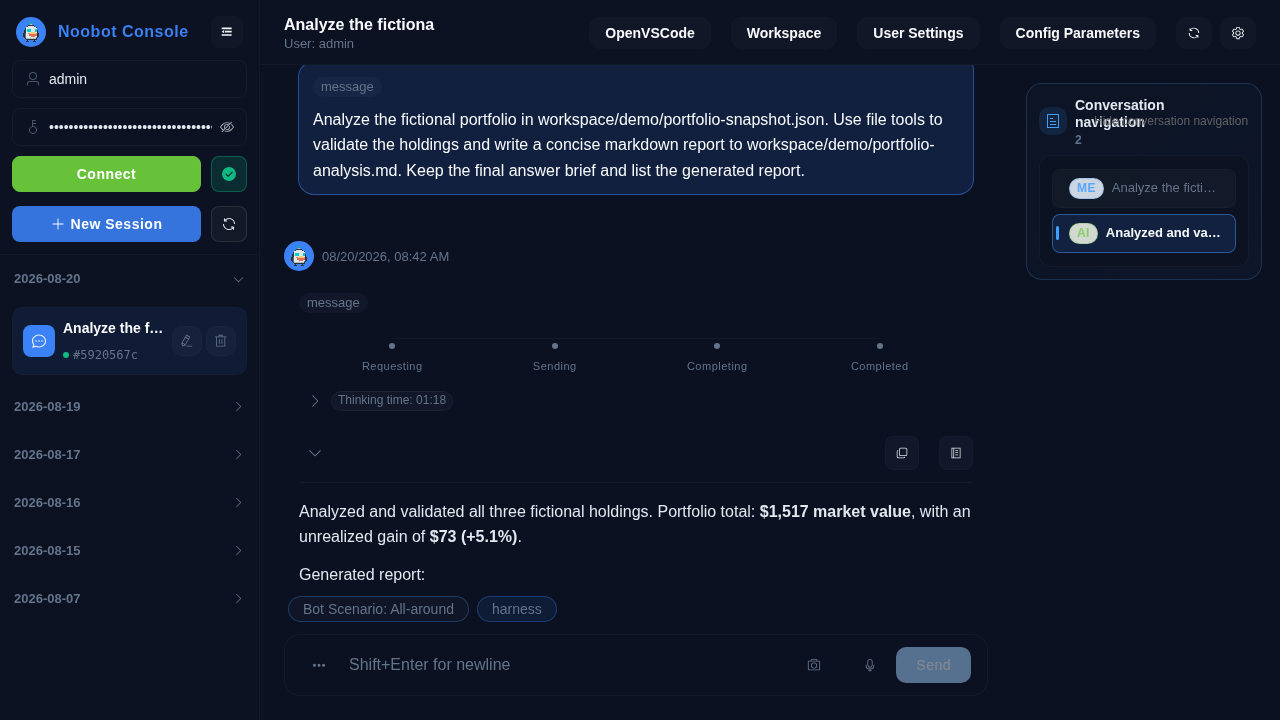
An English demo of a fictional portfolio analysis: Noobot verifies source data, chains four file tools, surfaces the live analysis flow, and publishes reusable report attachments.
Create 3D character animation with one prompt
Import a 3D character with basic motions and tell Noobot what you want it to do. You can create solo or multi-character scenes, make characters wave, walk, jump, and interact, then refine their movement, timing, and position in later messages. No animation code is required.
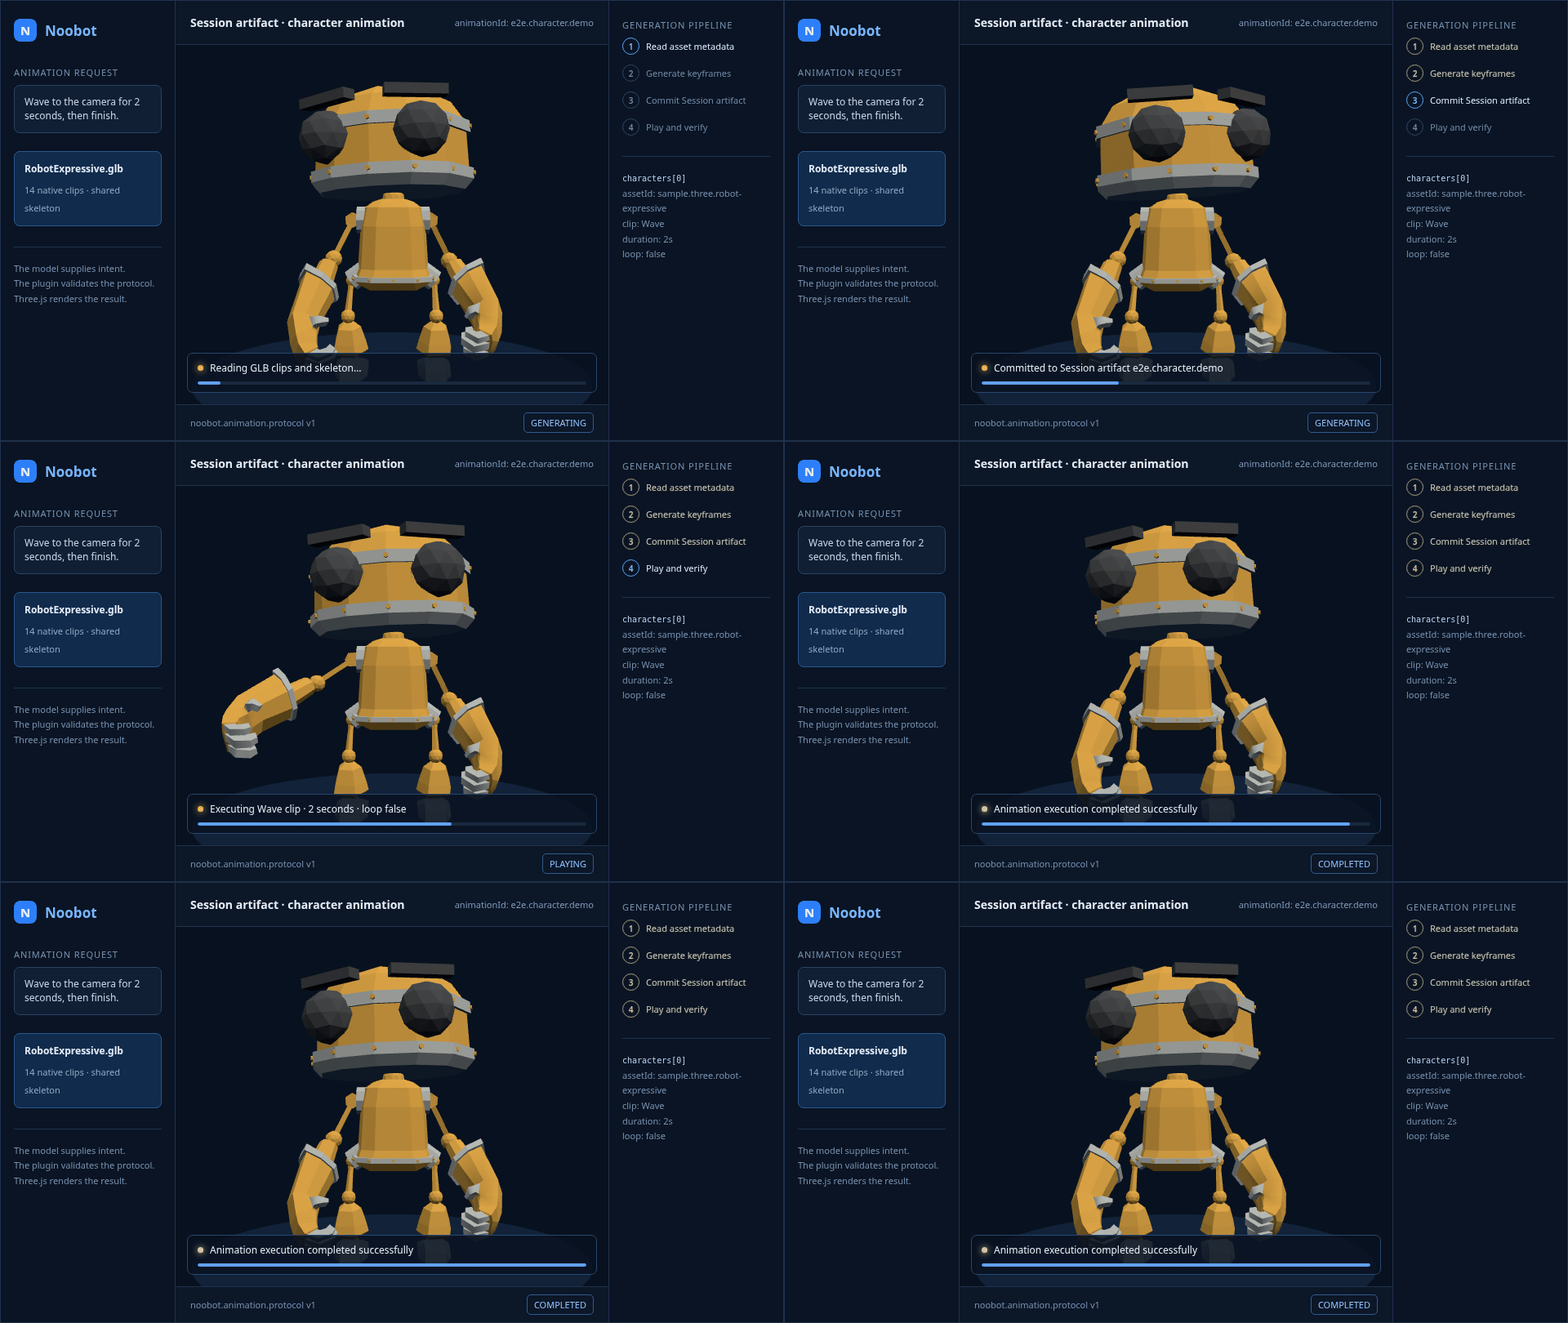
The recording below comes from a running Noobot system. It follows the complete creative experience: import and select a character, describe a scene in plain language, and watch it perform a continuous sequence of idle, wave, jump, walk, and finishing motions inside the conversation.
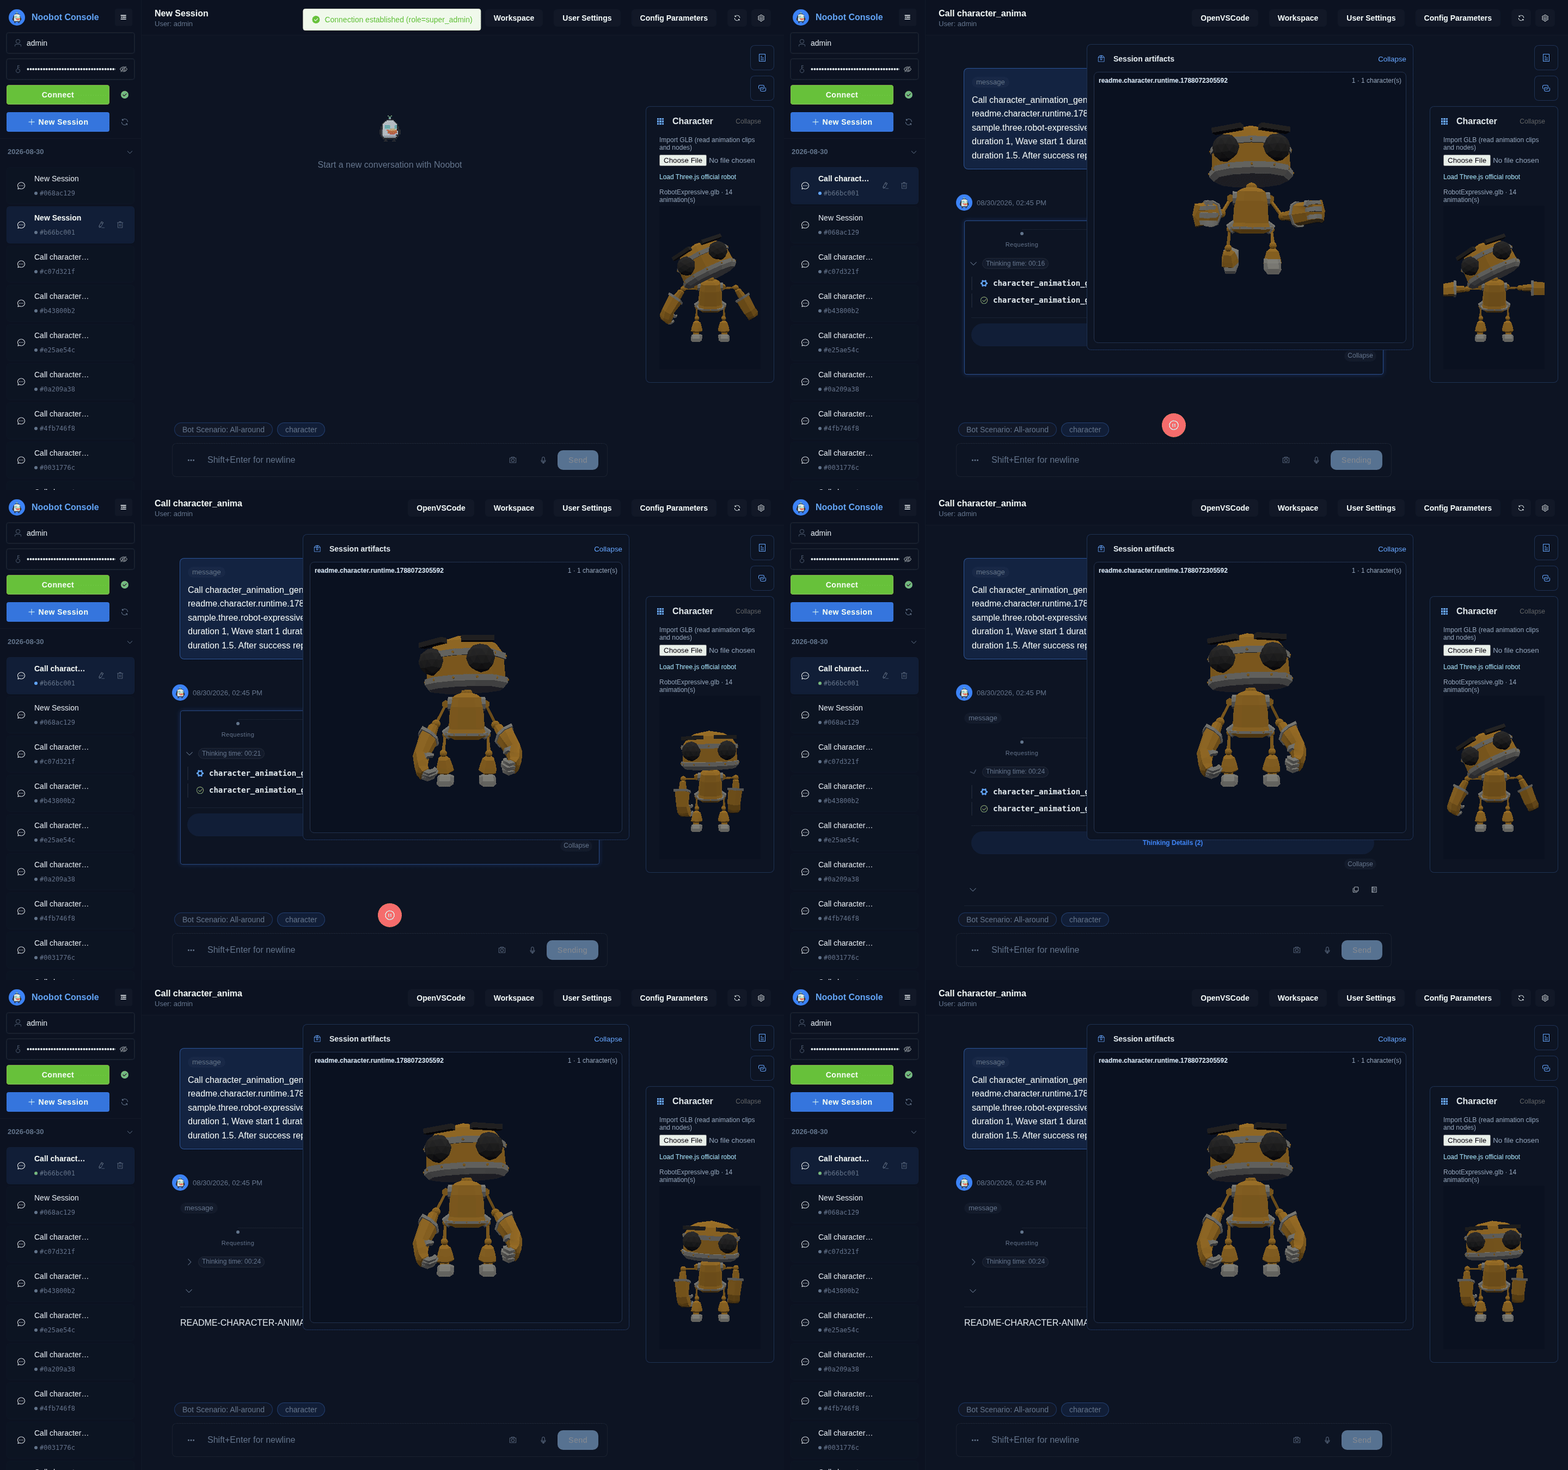
Each animation is saved as a work created in the current session. It remains available after a refresh and can be refined from any later message without scrolling back to where it was first created.
To get started, open Character, import a model, select one or more characters from More actions, and describe the movement you want to see.
View the completed analysis
Why Noobot
- Agent workspace: multi-user workspace and session isolation with persistent attachments and execution history.
- Tools and skills: file operations, native/script execution, browser automation, LibreOffice, FFmpeg, multimodal parsing/generation, services, and reusable skills.
- Model interoperability: OpenAI-compatible provider interfaces, provider/model-family routing, tool calling, streaming, and multimodal capability configuration.
- Multi-agent orchestration: task delegation, semantic workflows, workflow plugins, and harness-based planning/guidance/review.
- MCP and connectors: MCP servers plus database, terminal, email, and custom service connectors.
- AI character animation: import 3D characters and use natural language to create, preview, and refine solo or multi-character animation.
- Web and desktop: Vue 3 Web client and packaged Electron clients for Windows and macOS.
- Self-hosted operations: one-command PM2 + Caddy deployment, runtime audit events, replay, sanitization, and bilingual UI/configuration.
Get Noobot
| Option | Download or command | Notes |
|---|---|---|
| Windows installer | Latest release, then choose Noobot.Setup.<version>.exe | Recommended for Windows |
| Windows packaged archive | Latest release, then choose Noobot-<version>-win.zip | ZIP distribution without the setup wizard |
| macOS packaged archive | Latest release, then choose Noobot-<version>-mac.zip | Packaged macOS desktop client |
| Self-hosted Web | ./start.sh | Linux or macOS server deployment |
Opening the macOS app
The macOS release is not signed with an Apple Developer ID or notarized. After extracting the ZIP, move Noobot.app to Applications. If macOS blocks it, try opening it once, then go to System Settings > Privacy & Security and click Open Anyway. See Apple's Gatekeeper guidance.
Alternatively, if you trust the downloaded release, remove the quarantine attribute from this app in Terminal, then open it again:
xattr -dr com.apple.quarantine /Applications/Noobot.app
Quick Start
git clone https://github.com/xiayu1987/noobot.git
cd noobot

chmod +x start.sh
./start.sh
Notes:
start.shruns the project launcher first (scripts/project-launcher.mjs).- If
service/config/global.config.jsondoes not exist, an interactive setup wizard will create it. - The wizard lets you pick the model from the built-in model library.
api_keyandbase_urlare optional; when left empty, the model library's${ENV}references are kept so you can fill them in later viaconfig-params.json. It also asks for the execution isolation mode (sandboxruns commands in Docker,hostruns them directly on this machine). - For non-interactive environments, initialize with env vars (example):
NOOBOT_MODEL_NAME=gemini_3_7_flash \
NOOBOT_MODEL_API_KEY=xxx \
NOOBOT_MODEL_BASE_URL=https://example.com/v1 \
NOOBOT_EXECUTION_ISOLATION_MODE=sandbox \
./start.sh
NOOBOT_MODEL_NAME accepts a model library key or model name. NOOBOT_MODEL_API_KEY and NOOBOT_MODEL_BASE_URL are optional. NOOBOT_EXECUTION_ISOLATION_MODE is sandbox (default) or host.
Optional: NOOBOT_SETUP_WORKSPACE_ROOT (initial workspace_root, relative to service/, default ../workspace). Optional: NOOBOT_SETUP_LANG=zh|en (controls setup wizard language and synchronizes preferences.language plus built-in config copy text localization).
Default endpoints:
- Frontend:
http://127.0.0.1:10060 - Backend:
http://127.0.0.1:10061 - Agent Proxy:
http://127.0.0.1:10062 - Model proxy endpoints are generated from your configured providers.
Stop all services:
chmod +x stop-services.sh
./stop-services.sh
Requirements
- Node.js
^24.21.0 || ^26.9.0(Node.js 24 recommended; see rootpackage.json) - npm
>=12.0.2 <13(the repository pins npm 12.0.2) - Linux/macOS
Workspace Dependency Management
This repository uses npm workspaces from the root package.json.
cd noobot
npm ci
npm run install:mcp-test-service
Useful commands:
# run repository quality checks
npm run check:quality

# run all test scripts that exist
npm run test

# development servers
npm run dev:service
npm run dev:agent-proxy
npm run dev:client

# build the startup UI and web client
npm run build
The root package.json is the source of truth for the current workspace list and
repository-wide scripts. Package-specific scripts can also be run with
npm run -w <workspace> <script>.
Optional system deps:
libreoffice(Office document conversion)ffmpeg(audio/video processing)docker(programmable workspace compute sandbox)
Model Access Testing
Run npm run test:model-access for a local visual tester that reuses existing model configuration and the model runtime. Toggle and edit request parameters, import model-proxy logs, and inspect actual requests and raw responses. See the usage guide.
CLI
The noobot command runs a turn in-process against the same workspace and configuration as the service. Run it with npm run cli -- <args> inside service/, or install the command with npm link in service/. noobot --help prints the authoritative option list.
noobot -p "Summarize README.md" -f README.md        # new session, attach a file
echo "continue" | noobot -c                         # message from stdin, most recent session
noobot -r <sessionId> "next step"                   # existing session
noobot resume-turn -r <sessionId> --dialog <dialogProcessId> --turn <turnScopeId>
noobot sessions                                     # list sessions
noobot -o json -p "hi"                              # text | json | stream-json
-r/--resume <sessionId>is the only session selector;-c/--continuepicks the most recent session. They are mutually exclusive, and--connectoris only allowed for new sessions.resume-turncontinues a specific turn and requires-r,--dialogand--turn.- Attachment MIME types are resolved from the file extension; unknown extensions are sent as
application/octet-stream. - Exit codes:
0done,1failed,2usage or protocol error,3interaction unavailable,130stopped. - The CLI runs its own runtime. While the service is running, the UI cannot stop or resume CLI-started turns.
Desktop Packaging
Install dependencies first from the repository root:
npm install --workspaces
Then choose one of the following equivalent approaches.
From the repository root (the root scripts already select the workspace with
-w):
# Build the Windows desktop package
npm run build:windows

# Build the macOS desktop package
npm run build:mac
Or run the workspace script from the corresponding desktop client directory:
# Windows (run from client/windows)
cd client/windows
npm run build:win

# macOS (run from client/mac)
cd ../mac
npm run build:mac
The commands prepare the frontend, Electron client, and backend before invoking
electron-builder. The generated artifacts are written to the corresponding
desktop client's dist/ directory.
Config
- Main config doc:
CONFIGURATION.md - Session log WebSocket, retention, and debug switches are documented in
CONFIGURATION.md. - Contributing guide:
CONTRIBUTING.md - Coding standard:
CODING-STANDARD.md - Backend docs: English | 中文
- Architecture, protocols, runtime parameters, and testing: documentation index
Environment variables for start.sh:
CADDY_ADDR(default:10060)AGENT_PROXY_UPSTREAM(default127.0.0.1:10062)PORT(service port, default10061)
Example:
CADDY_ADDR=:8080 PORT=3001 AGENT_PROXY_UPSTREAM=127.0.0.1:3002 \
AGENT_PROXY_PORT=3002 ./start.sh
PM2 (local)
The PM2 scripts below manage one package at a time and do not run the project initialization launcher. For first-time deployment, dependency installation, frontend build, or config auto-sync, use
./start.sh.
cd service && npm run pm2:list
cd service && npm run pm2:logs
cd service && npm run pm2:stop
cd service && npm run pm2:delete

cd agent-proxy && npm run pm2:list
cd agent-proxy && npm run pm2:logs
cd agent-proxy && npm run pm2:stop
cd agent-proxy && npm run pm2:delete

cd model-proxy && npm run pm2:list
cd model-proxy && npm run pm2:logs
cd model-proxy && npm run pm2:stop
cd model-proxy && npm run pm2:delete