
autobrr
Modern, easy to use download automation for torrents and usenet.
Automatically checked · GitHub checked 2026-11-12
Overview

autobrr
autobrr redefines download automation for torrents and Usenet, drawing inspiration from tools like trackarr, autodl-irssi, and flexget. We've combined the best of these worlds into one versatile tool that can do it all, and then some.


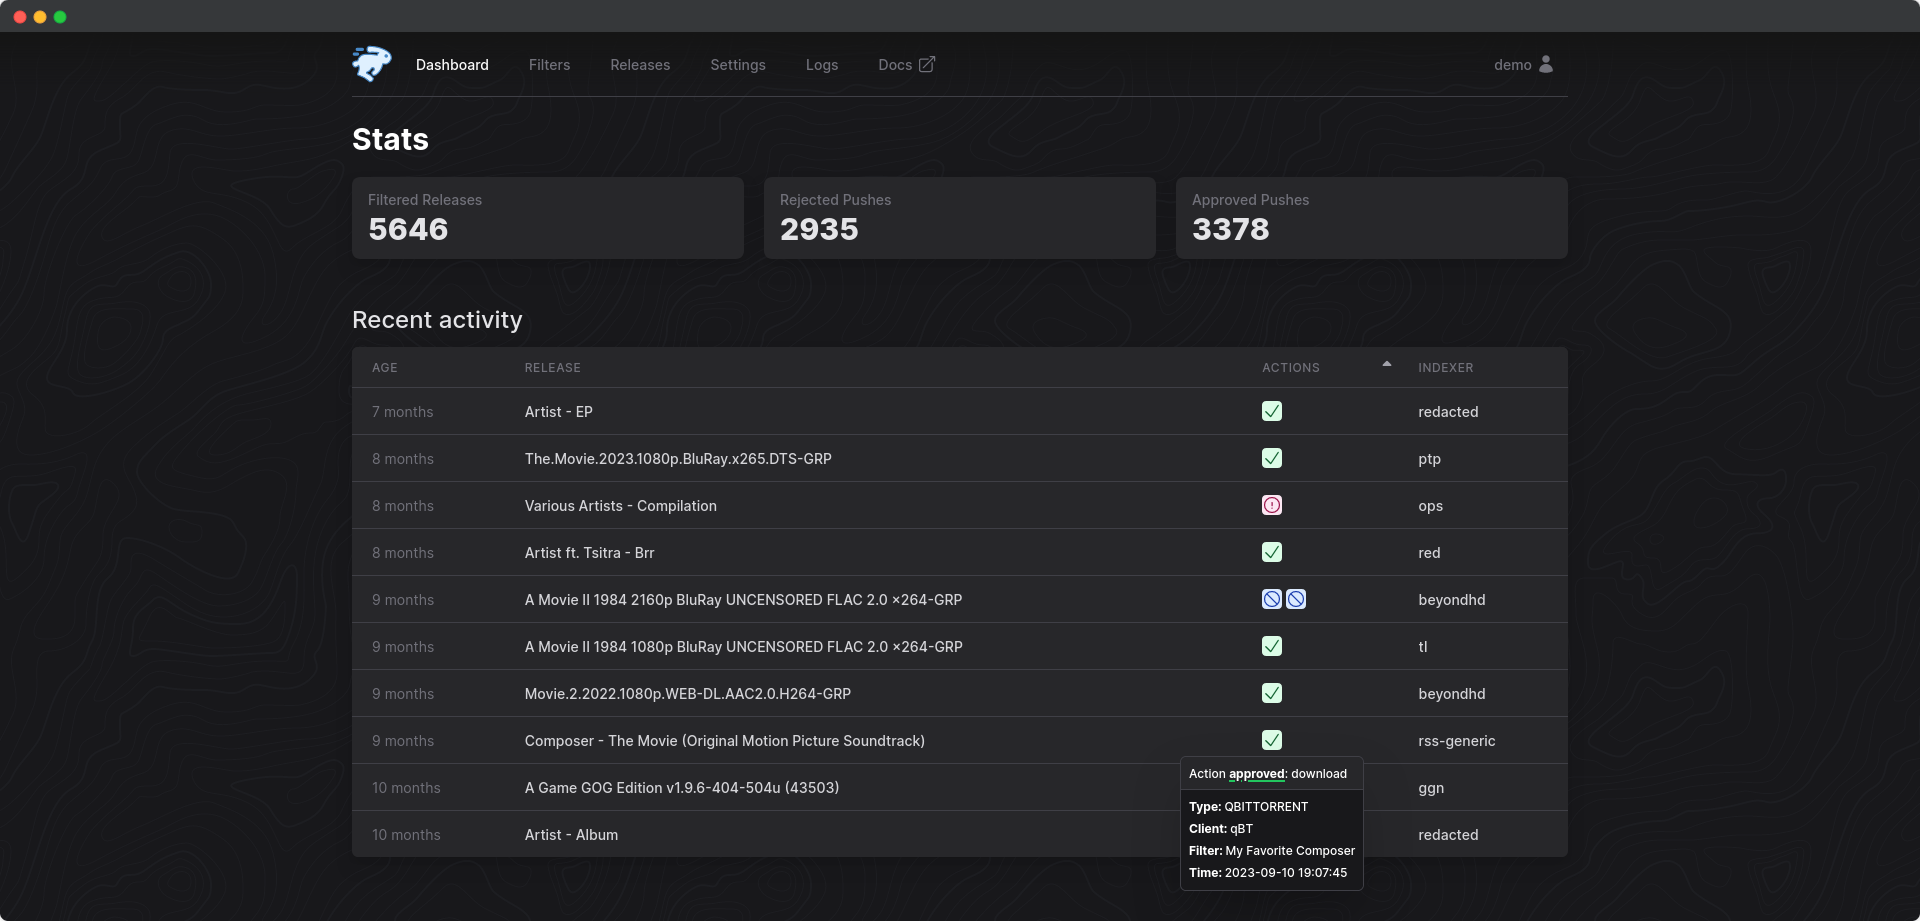
We also have a light theme. Check it out here.

Documentation
Full documentation can be found at https://autobrr.com
Table of Contents
What Is Autobrr?
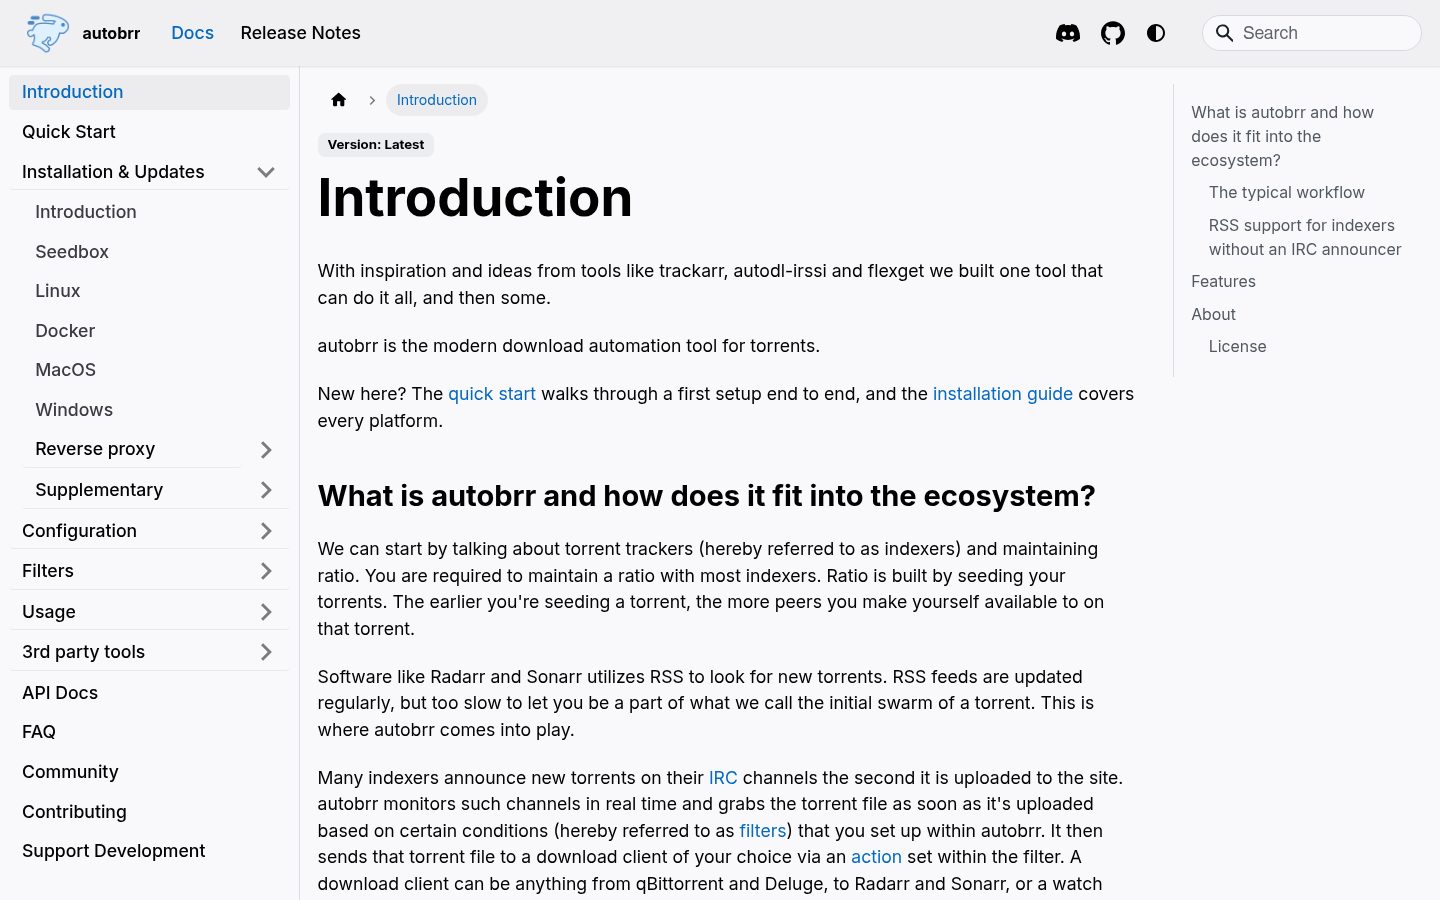
What is autobrr, and how does it fit into the ecosystem?
We can start by talking about torrent trackers (hereby referred to as indexers) and maintaining ratio. You are required to maintain a ratio with most indexers. Ratio is built by seeding your torrents. The earlier you're seeding a torrent, the more peers you make yourself available to on that torrent.
Software like Radarr and Sonarr uses RSS to look for new torrents. RSS feeds are updated regularly, but too slow to let you be a part of what we call the initial swarm of a torrent. This is where autobrr comes into play.
Many indexers announce new torrents on their IRC channels the second it is uploaded to the site. autobrr monitors such channels in real time and grabs the torrent file as soon as it's uploaded based on certain conditions (hereby referred to as filters) that you set up within autobrr. It then sends that torrent file to a download client of your choice via an action set within the filter. A download client can be anything from qBittorrent and Deluge, to Radarr and Sonarr, or a watch folder.
When your autobrr filter is set to send the torrent files to Radarr and Sonarr, they will decide if it's something they want and then forward it to the torrent client they are set up with.
autobrr can also send matches (torrent files that meets your filter's criteria) directly to torrent clients like qBittorrent, Deluge, r(u)Torrent, and Transmission. You don't need to use the *arr suite to make use of autobrr.
Key Features
- Torrents and Usenet support
- Support for 100+ torrent trackers with IRC announces
- Newznab, Torznab, and RSS support to easily get access to hundreds of torrent and Usenet indexers
- Torrent Magnet support
- Powerful but simple filtering with RegEx support (like in autodl-irssi)
- Easy to use and mobile friendly web UI (with dark mode!) to manage everything
- Built on Go and React making autobrr lightweight and perfect for supporting multiple platforms (Linux, FreeBSD, Windows, macOS) on different architectures (e.g. x86, ARM)
- Great container support (Docker, k8s/Kubernetes)
- Database engine supporting both PostgreSQL and SQLite
- Authentication support including built-in auth and OpenID Connect (OIDC)
- Notifications (Discord, Telegram, Notifiarr, Pushover, Gotify, Shoutrrr, ntfy)
- One autobrr instance can communicate with multiple clients (torrent, Usenet, and *arr) on remote servers
- Base path / Subfolder (and subdomain) support for convenient reverse-proxy support
Available Download Clients and Actions
- qBittorrent: Includes built-in re-announce, categories, rules, max active downloads, etc.
- Deluge v1+ and v2+
- rTorrent
- Transmission
- Porla
- aria2
- Sonarr, Radarr, Lidarr, Whisparr, Readarr, Sportarr: Pushes releases directly for early swarm participation, rather than relying on RSS feeds.
- SABnzbd and NZBGet (Usenet): Integrates smoothly for Usenet downloads.
- Watch Folder: Monitors specified folders for new files.
- Exec Custom Scripts: Execute tailored scripts for advanced automation.
- Webhook: Offers webhook support for diverse integration needs.
RSS and Usenet Support
A lot of indexers do not announce new torrents in an IRC channel. You can still make use of these indexers with autobrr since it has built-in support for feeds as well. Both Torznab, Newznab, and regular RSS is supported. RSS indexers are treated the same way as regular indexers within autobrr.
Usenet support via Newznab feeds allows you to easily manage everything in a single application. While there are a lot of applications that handle RSS well, we think autobrr offers very easy-to-use filtering to help you get the content you want.
You can use Usenet feeds and send to arrs or send directly to SABnzbd or NZBGet.
Installation
For comprehensive installation instructions, visit our Installation Guide. This guide provides detailed steps for different platforms, including Windows, Linux, Docker, and more.
Remember to head over to our Configuration Guide to learn how to set up your indexers, IRC, and download clients after you're done installing.
Swizzin (dedi)
Swizzin users can simply run:
sudo box install autobrr
Saltbox
Saltbox users can simply run:
sb install autobrr
For more info check the docs
QuickBox
QuickBox users can simply run:
qb install autobrr -u ${username}
For more info check the docs
Shared Seedbox
One-Click Installer & Quick Installer
- HostingByDesign (former Seedbox.io) via box -
box install autobrr - Swizzin.net via box -
box install autobrr - Seedit4.me
- SeedHost.eu
- Ultra.cc
- Whatbox.ca - has built-in integration with their apps, have to enable their "Expert" mode for external connections
Installation Scripts
We have support for a couple of other providers out of the box.
Please contact us on Discord if your provider is missing.
The scripts require some input, but do most of the work.
Feralhosting
wget https://gobrr.sh/install_feral && bash install_feral
Bytesized Hosting
wget https://gobrr.sh/install_bytesized && bash install_bytesized
Other providers
For other providers the Seedbox.io installer should work. If not, open an issue or contact us on Discord
wget https://gobrr.sh/install_sbio && bash install_sbio
Docker Compose
Modify accordingly if running with unRAID or setting up with Portainer.
- Logging is optional
- Host port mapping might need to be changed to not collide with other apps
- Change
BASE_DOCKER_DATA_PATHto match your setup. Can be simply./data - Set a custom network if needed
Create docker-compose.yml and add the following. If you have an existing setup change to fit that.
version: "3.7"

services:
  autobrr:
    container_name: autobrr
    image: ghcr.io/autobrr/autobrr:latest
    restart: unless-stopped
    environment:
      - TZ=${TZ}
    user: 1000:1000
    volumes:
      - ${BASE_DOCKER_DATA_PATH}/autobrr/config:/config
    ports:
      - 7474:7474
Then start with:
docker compose up -d
Distroless Docker Images
[!CAUTION] This image comes without a shell, and external filtering and actions relying on
execwill therefore not work with anything but compiled static binaries.To clarify:
BASHandSHshell scripts WILL NOT WORK!Use the standard image if you rely on this functionality.
For users who prioritize container security, one of the long-term maintainers offers alternative Docker images built on Distroless. Specifically the distroless/static-debian12:nonroot base image.
Distroless images do not contain a package manager or shell, thereby reducing the potential attack surface and making them a more secure option. These stripped-back images contain only the application and its runtime dependencies.
The repository for these builds can be found here: https://github.com/s0up4200/autobrr-distroless
Windows
Check the Windows Setup Guide here.
MacOS
Install Homebrew
/bin/bash -c "$(curl -fsSL https://raw.githubusercontent.com/Homebrew/install/HEAD/install.sh)"
Install autobrr
brew install autobrr
Run
brew services start autobrr
Linux Generic
Download the latest release, or download the source code and build
it yourself using make build.
wget $(curl -s https://api.github.com/repos/autobrr/autobrr/releases/latest | grep download | grep linux_x86_64 | cut -d\" -f4)
Unpack
Run with root or sudo. If you do not have root, or are on a shared system, place the binaries somewhere in your home directory like ~/.bin.
tar -C /usr/local/bin -xzf autobrr*.tar.gz
This will extract both autobrr and autobrrctl to /usr/local/bin.
Note: If the command fails, prefix it with sudo and re-run again.
Systemd (Recommended)
On Linux-based systems, it is recommended to run autobrr as a sort of service with auto-restarting capabilities, in order to account for potential downtime. The most common way is to do it via systemd.
You will need to create a service file in /etc/systemd/system/ called autobrr.service.
touch /etc/systemd/system/[email protected]
Then place the following content inside the file (e.g. via nano/vim/ed):
[Unit]
Description=autobrr service for %i
After=syslog.target network-online.target

[Service]
Type=simple
User=%i
Group=%i
ExecStart=/usr/bin/autobrr --config=/home/%i/.config/autobrr/

[Install]
WantedBy=multi-user.target
Start the service. Enable will make it startup on reboot.
systemctl enable --now autobrr@$USER.service
By default, the configuration is set to listen on 127.0.0.1. While autobrr works fine as is exposed to the internet,
it is recommended to use a reverse proxy
like nginx, caddy
or traefik.
If you are not running a reverse proxy change host in the config.toml to 0.0.0.0.
Environment Variables
The following environment variables can be used:
| Variable | Description | Default |
|---|---|---|
AUTOBRR__HOST | Listen address | 127.0.0.1 |
AUTOBRR__PORT | Listen port | 7474 |
AUTOBRR__BASE_URL | Base URL for reverse proxy | / |
AUTOBRR__BASE_URL_MODE_LEGACY | Base URL Mode Legacy for old proxy setups | true |
AUTOBRR__LOG_LEVEL | Log level (DEBUG, INFO, WARN, ERROR) | INFO |
AUTOBRR__LOG_PATH | Log file location | - |
AUTOBRR__LOG_MAX_SIZE | Max size in MB before rotation | 10 |
AUTOBRR__LOG_MAX_BACKUPS | Number of rotated logs to keep | 5 |
AUTOBRR__CUSTOM_DEFINITIONS | Path to custom indexer definitions | - |
AUTOBRR__CHECK_FOR_UPDATES | Enable update checks | true |
AUTOBRR__DATABASE_TYPE | Database type (sqlite/postgres) | sqlite |
AUTOBRR__DATABASE_MAX_BACKUPS | Number of backups to keep | 5 |
AUTOBRR__DATABASE_DSN | Database connection string. Use this or individual vars | - |
AUTOBRR__POSTGRES_HOST | PostgreSQL host | - |
AUTOBRR__POSTGRES_PORT | PostgreSQL port | 5432 |
AUTOBRR__POSTGRES_DATABASE | PostgreSQL database name | - |
AUTOBRR__POSTGRES_DB | PostgreSQL database name | - |
AUTOBRR__POSTGRES_USER | PostgreSQL username | - |
AUTOBRR__POSTGRES_PASS | PostgreSQL password | - |
AUTOBRR__POSTGRES_PASSWORD | PostgreSQL password | - |
AUTOBRR__POSTGRES_SSLMODE | PostgreSQL SSL mode | disable |
AUTOBRR__POSTGRES_SOCKET | PostgreSQL unix socket | - |
AUTOBRR__POSTGRES_EXTRA_PARAMS | Additional PostgreSQL parameters | - |
AUTOBRR__OIDC_ENABLED | Enable OpenID Connect authentication | false |
AUTOBRR__OIDC_ISSUER | OIDC issuer URL | - |
AUTOBRR__OIDC_CLIENT_ID | OIDC client ID | - |
AUTOBRR__OIDC_CLIENT_SECRET | OIDC client secret | - |
AUTOBRR__OIDC_REDIRECT_URL | OIDC callback URL | - |
AUTOBRR__OIDC_DISABLE_BUILT_IN_LOGIN | Disable password login, both the form and the API (requires OIDC) | false |
AUTOBRR__OIDC_AUTO_REDIRECT | Redirect unauthenticated visitors to the OIDC provider | false |
AUTOBRR__AUTH_TRUSTED_USER_HEADER | Enable forward auth with this proxy username header (see Forward authentication) | - |
AUTOBRR__AUTH_TRUSTED_USER | The only username allowed in forward auth. Required in that mode | - |
AUTOBRR__AUTH_LOGOUT_URL | Proxy logout URL for the log out button in forward auth | - |
AUTOBRR__CORS_ALLOWED_ORIGINS | Allowed CORS origins, comma separated. Required when auth is disabled or forwarded | - |
AUTOBRR__AUTH_DISABLED | Disable built-in authentication (see Disabling built-in authentication) | false |
AUTOBRR__AUTH_DISABLED_ACKNOWLEDGEMENT | Must be set to the acknowledgement value from the docs | - |
AUTOBRR__AUTH_ALLOWED_PEER_CIDRS | Peer allowlist while auth is disabled or forwarded, comma separated CIDRs or IPs | - |
AUTOBRR__AUTH_ALLOWED_HOSTS | Extra Host header names allowed while auth is disabled or forwarded, comma separated | - |
AUTOBRR__AUTH_CLIENT_IP_HEADER | Proxy header to log client IPs from while auth is disabled or forwarded | - |
AUTOBRR__TRUSTED_PROXIES | Reverse proxy CIDRs or IPs allowed to set X-Forwarded-For, comma separated. Unset trusts any peer | - |
AUTOBRR__METRICS_ENABLED | Enable Metrics server | false |
AUTOBRR__METRICS_HOST | Metrics listen address | 127.0.0.1 |
AUTOBRR__METRICS_PORT | Metrics listen port | 9074 |
AUTOBRR__METRICS_BASIC_AUTH_USERS | Metrics basic auth users | - |
AUTOBRR__PROFILING_ENABLED | Enable profiling | false |
AUTOBRR__PROFILING_HOST | Profiling listen address | 127.0.0.1 |
AUTOBRR__PROFILING_PORT | Profiling listen port | 6060 |
Automatic OIDC login
With OIDC configured, set AUTOBRR__OIDC_AUTO_REDIRECT=true to send unauthenticated visitors directly to your provider's login page. OIDC must be enabled with either AUTOBRR__OIDC_ENABLED=true or oidcEnabled = true in config.toml. You can also set oidcAutoRedirect = true in config.toml. Restart autobrr after changing the setting. After the provider login, autobrr returns you to the page you were trying to open.
The default is false, which keeps the login page and its OpenID Connect button. AUTOBRR__OIDC_DISABLE_BUILT_IN_LOGIN separately controls whether the password form appears.
To reach the login page while automatic redirection is on, for example when the provider is down, open /login?autoRedirect=false (under your base URL, if you set one). Signing out of autobrr also lands there, so an active provider session does not sign you straight back in.
Docker secrets
All ENV vars have a _FILE option where it can read contents from a file, such as docker secrets. See the example below:
services:
  autobrr:
    image: ghcr.io/autobrr/autobrr:latest
    container_name: autobrr
    volumes:
      - ./config:/config
    ports:
      - "7474:7474"
    restart: unless-stopped
    environment:
      - AUTOBRR__DATABASE_TYPE=postgres
      - AUTOBRR__POSTGRES_HOST=postgres
      - AUTOBRR__POSTGRES_PORT=5432
      - AUTOBRR__POSTGRES_USER=autobrr
      - AUTOBRR__POSTGRES_PASSWORD_FILE=/run/secrets/db_password
      - AUTOBRR__POSTGRES_DB=autobrr
    secrets:
      - db_password

  postgres:
    image: postgres:12.10
    container_name: postgres
    volumes:
      - postgres:/var/lib/postgresql/data
    ports:
      - "5432:5432"
    environment:
      - POSTGRES_USER=autobrr
      - POSTGRES_PASSWORD_FILE=/run/secrets/db_password
      - POSTGRES_DB=autobrr
    secrets:
      - db_password

secrets:
  db_password:
    file: db_password.txt

volumes:
  postgres:
Forward authentication
If a reverse proxy in front of autobrr authenticates every request (Authelia, Authentik, or any forward_auth/auth_request setup), autobrr can take the username from a header the proxy sets instead of using its own login. Every request must carry that header, so a proxy that stops authenticating gets 403 instead of silent admin access, the logs show who did what, and API keys and their management keep working. Prefer this over disabling authentication when your proxy can pass the username on.
The proxy must overwrite the header on every request. If it passes a client's value through, anyone who reaches the proxy can claim to be authTrustedUser. This matters most on paths the identity provider lets through without a login (an Authelia bypass rule for /api, for example): the auth server returns no username there, and the proxy must remove the client's header instead of forwarding it. The examples below do both; they were checked with a forged header on nginx 1.30.6, Caddy 2.11.8 and Traefik 3.7.17.
# Header the proxy sets with the authenticated username.
# Authelia: Remote-User, Authentik: X-authentik-username.
authTrustedUserHeader = "Remote-User"
# The reverse proxy address. Single addresses only (/32 or /128): any allowlisted
# peer can send the header itself.
authAllowedPeerCIDRs = ["127.0.0.1/32"]
# Every URL you access autobrr at, as in disabled mode.
corsAllowedOrigins = "https://autobrr.example.com"
# The only user accepted, exactly as the proxy sends it, including case. Other
# users your proxy authenticates get 403.
authTrustedUser = "ze0s"
# Optional: the proxy's logout URL, used by the log out button. Unset hides it.
#authLogoutURL = "https://auth.example.com/logout"
Example with nginx and Authelia (proxy_set_header replaces any Remote-User the client sent, and drops it when the variable is empty):
# /internal/authelia/authz is the auth_request location from Authelia's nginx guide
location / {
    auth_request /internal/authelia/authz;
    auth_request_set $user $upstream_http_remote_user;
    proxy_set_header Remote-User $user;
    proxy_pass http://127.0.0.1:7474;
}
Example with Caddy and Authelia (copy_headers replaces any Remote-User the client sent, and removes it when Authelia returns none):
autobrr.example.com {
	forward_auth authelia:9091 {
		uri /api/authz/forward-auth
		copy_headers Remote-User
	}
	reverse_proxy localhost:7474
}
Example with Traefik and Authentik (authResponseHeaders replaces any X-authentik-username the client sent, and removes it when Authentik returns none):
http:
  middlewares:
    authentik:
      forwardAuth:
        address: http://authentik-server:9000/outpost.goauthentik.io/auth/traefik
        authResponseHeaders:
          - X-authentik-username
Use authResponseHeaders with Traefik, not authResponseHeadersRegex: the regex is matched case-sensitively against the name as Traefik writes it (X-Authentik-Username), so ^X-authentik- matches nothing and the client's header reaches autobrr unchanged.
To check your proxy, send a forged header to a path the identity provider does not protect, if you have one. Use your own authTrustedUserHeader and authTrustedUser; a forged header with any other name proves nothing, because autobrr ignores it:
# Authelia (authTrustedUserHeader = "Remote-User")
curl -i -H 'Remote-User: ze0s' https://autobrr.example.com/api/auth/validate
# Authentik (authTrustedUserHeader = "X-authentik-username")
curl -i -H 'X-authentik-username: ze0s' https://autobrr.example.com/api/auth/validate
403 means the proxy removed the header, which is what you want. A redirect or 401 from the identity provider means the path is protected. 200 with your username means the proxy passes on client headers: fix it before relying on forward authentication.
Things to be aware of:
- Cannot be combined with
authDisabled,oidcEnabled,oidcDisableBuiltInLogin,oidcAutoRedirect,oidcAllowedSubjectoroidcAllowedEmail; autobrr refuses to start. The otheroidc*settings are ignored.X-API-Tokencannot be the user header, since it carries API keys. - autobrr has one admin account, so it accepts one username. Requests without the header, with an empty header, or from any other user get 403, and the rejected username is logged. The match is exact, including case, because identity providers can hold accounts that differ only by case. If the proxy sends an email or display name instead of the username, set
authTrustedUserto that. If the header appears more than once, the last value is used. - An API key sent with
X-API-Tokenor?apikey=takes precedence over the header, so integrations work through proxy bypass rules for API paths. - Groups headers such as
Remote-Groupsare not read: the one accepted user has full access. - The
Hostallowlist, browser request checks,Content-Typerule and framing policy described under Disabling built-in authentication apply in this mode too, and the same advice abouthost = "127.0.0.1"holds.
Disabling built-in authentication
For deployments where a reverse proxy in front of autobrr performs authentication itself and cannot pass the username on, the built-in login can be disabled. Autobrr then performs no authentication of its own: every request whose network peer matches the allowlist gets full administrative access, so this must only be used when the proxy authenticates every route and the autobrr port is not reachable any other way.
All of the following are required. Copy the authDisabledAcknowledgement value from the authentication docs.
authDisabled = true
authDisabledAcknowledgement = "<value from the docs>"
# The immediate TCP peer(s) autobrr sees - the reverse proxy address, as exact
# /32 or /128 entries. NOT the end user's address, and never a forwarded header.
authAllowedPeerCIDRs = ["127.0.0.1/32", "::1/128"]
# Every URL you access autobrr at (UI or API). Browser requests with any other
# Origin are rejected to block CSRF, unless it matches the Host header autobrr
# receives. Only these origins and autobrr itself may frame autobrr.
corsAllowedOrigins = "https://autobrr.example.com"
# Optional: extra hostnames allowed in the Host header, see below.
#authAllowedHosts = ["autobrr"]
# Optional: a header your proxy overwrites on every request with the end user's
# IP (e.g. X-Real-IP), used for access logs only.
#authClientIPHeader = "X-Real-IP"
Example with Caddy performing forward auth for every route:
autobrr.example.com {
	forward_auth authelia:9091 {
		uri /api/authz/forward-auth
	}
	reverse_proxy localhost:7474
}
Things to be aware of:
- Keep
host = "127.0.0.1"(or an equally private bind) so the backend port cannot be reached without going through the proxy. A wildcard bind combined with a broad peer allowlist hands out admin access to the whole range - loopback, Docker network gateways, Kubernetes node addresses, and shared proxy or CDN ranges can all carry traffic from callers that are not your proxy. - Broad CIDRs are warned about at startup: every address in an allowlisted range has full administrative access, so list the exact proxy address instead of its subnet.
- Every request, including from curl, scripts and integrations, must name an allowed hostname in its
Hostheader, which blocks DNS rebinding. IP addresses,localhost, the machine hostname and the hosts incorsAllowedOriginsare always allowed. Add any other name toauthAllowedHosts, for exampleautobrrwhen nginx proxies tohttp://autobrr:7474withoutproxy_set_header Host $host. Rejected requests are logged with the host they used. - While auth is disabled, mutating API requests that carry a body must send
Content-Type: application/json, and API key management is unavailable (an authless caller could otherwise mint a credential that outlives re-enabling auth). Existing API keys keep working after you re-enable authentication. - If you started with auth disabled and never created a user, re-enabling authentication exposes first-user onboarding to whoever reaches the login page first. Create the user right after re-enabling, or create one up front with
autobrrctl create-user. - To re-enable authentication: remove the
authDisabledsettings, restart autobrr, then verify you are asked to log in.
Community
Join our friendly and welcoming community on Discord! Connect with fellow autobrr users, get advice, and share your experiences. Whether you're seeking help, wanting to contribute, or just looking to discuss your ideas, our community is a hub of discussion and support. We're all here to help each other out, so don't hesitate to jump in!
Contributing
Whether you're fixing a bug, adding a feature, or improving documentation, your help is appreciated. Here's how you can contribute:
Reporting Issues and Suggestions
- Report Bugs: Encountered a bug? Please report it using our bug report template. Include detailed steps to reproduce, expected behavior, and any relevant screenshots or logs.
- Feature Requests: Submit your feature request by opening a new idea in our discussions. Describe your idea and how it will improve
autobrr.
Code Contributions
Check out the full guide for contributing here.
- Fork and Clone: Fork the
autobrrrepository and clone it to start working on your changes. - Branching: Create a new branch for your changes. Use a descriptive name for easy understanding.
- Coding: Ensure your code is well-commented for clarity.
- Commit Guidelines: We appreciate the use of Conventional Commit Guidelines when writing your commits.
- There is no need for force pushing or rebasing. We squash commits on merge to keep the history clean and manageable.
- Pull Requests: Submit a pull request with a clear description of your changes. Reference any related issues.
- Code Review: Be open to feedback during the code review process.
Documentation
See an area that needs clarity or additional information? Feel free to update our documentation here.
Code of Conduct
We follow a code of conduct that promotes respectful and harassment-free experiences. Please read our Code of Conduct before participating.
License
autobrr is proudly open-source and is released under the GNU General Public License v2 or later (GPLv2+). This license allows you the freedom to run, study, share, and modify the software:
- Freedom to Run: You can run autobrr in any environment, for any purpose.
- Freedom to Study and Modify: Access to the source code allows you to study and modify autobrr to suit your needs.
- Freedom to Share: You can redistribute copies of autobrr to help others.
- Freedom to Enhance: Contributions to improve autobrr are always welcome.
Copyright 2021-2024